Step-by-Step Guide: Core Data Fetch Requests with Examples in Swift
Learn how to set up Core Data fetch requests in iOS with Swift. This comprehensive guide includes practical examples to retrieve and manage data efficiently.

Share This Article
When working with Core Data in iOS, fetching data efficiently is crucial for a seamless user experience. Fetch requests allow developers to retrieve specific data from Core Data storage using various conditions, filters, and sorting options.
In this guide, we will explore how to set up Core Data fetch requests in iOS using Swift with practical code examples.
What is a Fetch Request in Core Data?
A fetch request is a query that retrieves specific data from Core Data storage. Developers can define the fetch criteria using predicates, sort descriptors, and fetch limits.
Step 1: Set Up Core Data in iOS
To begin, ensure that Core Data is set up in your Xcode project:
- Create a new project: Select "Use Core Data" during project setup.
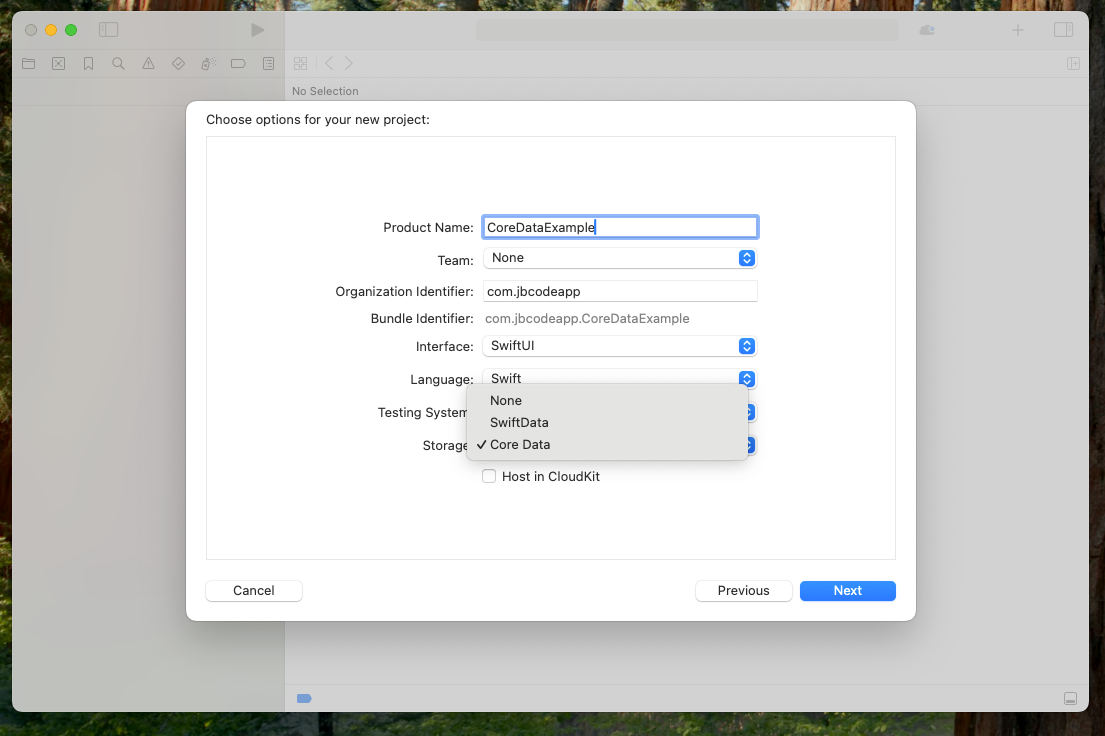 2. Define your data model: Create entities and attributes in the
 .xcdatamodeld file.
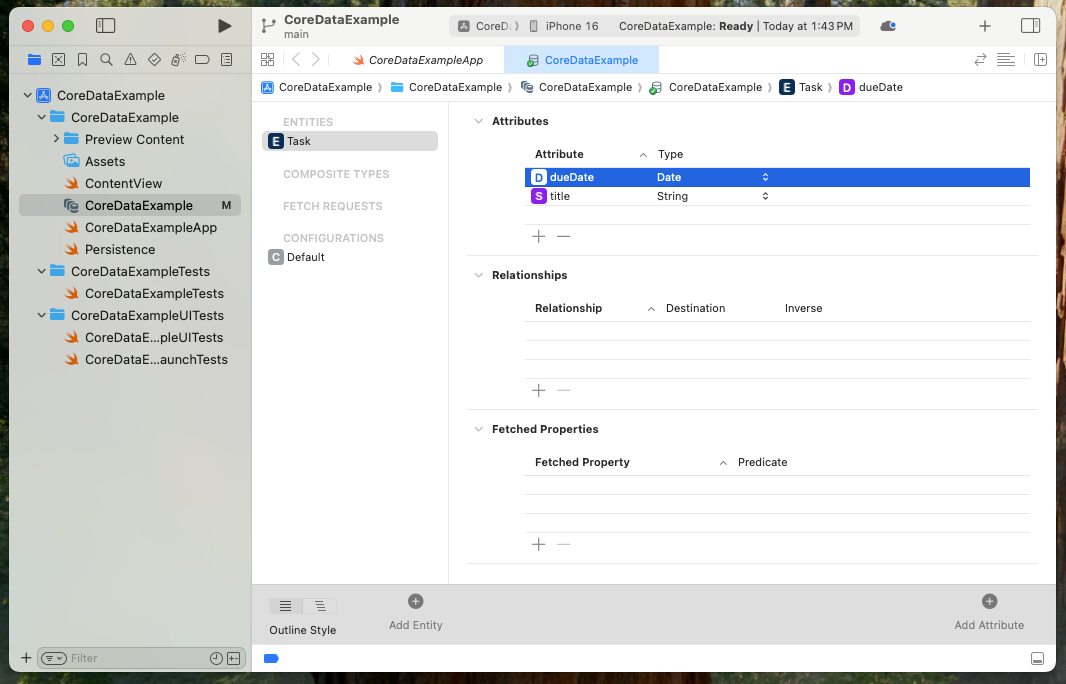
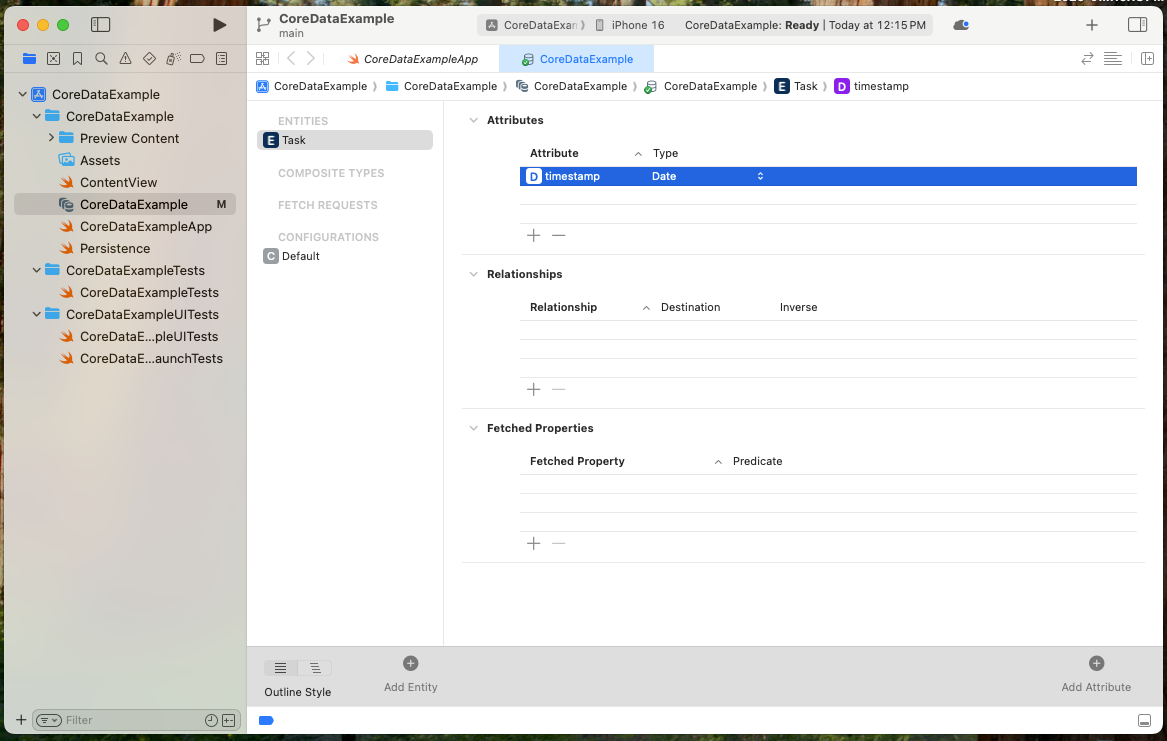 Entity Example: Let's define a
 Task entity with the following attributes:
title(String)priority(Integer)
Step 2: Basic Fetch Request Example
Here's how to fetch all Task records from Core Data:
import CoreData
import UIKit

func fetchAllTasks() {
    let context = (UIApplication.shared.delegate as! AppDelegate).persistentContainer.viewContext
    let fetchRequest = NSFetchRequest<NSManagedObject>(entityName: "Task")

    do {
        let tasks = try context.fetch(fetchRequest)
        tasks.forEach { task in
            let title = task.value(forKey: "title") as? String ?? "No Title"
            print("Task Title: \(title)")
        }
    } catch {
        print("Failed to fetch tasks: \(error)")
    }
}
Usage:
Call fetchAllTasks() to retrieve and print all task records.
Step 3: Using Predicates for Filtering
To fetch tasks with a specific priority, use an NSPredicate:
func fetchTasksWithPriority(priority: Int) {
    let context = (UIApplication.shared.delegate as! AppDelegate).persistentContainer.viewContext
    let fetchRequest = NSFetchRequest<NSManagedObject>(entityName: "Task")
    fetchRequest.predicate = NSPredicate(format: "priority == %d", priority)

    do {
        let tasks = try context.fetch(fetchRequest)
        tasks.forEach { task in
            let title = task.value(forKey: "title") as? String ?? "No Title"
            print("High Priority Task: \(title)")
        }
    } catch {
        print("Failed to fetch tasks: \(error)")
    }
}
Example Usage:
fetchTasksWithPriority(priority: 1)
Step 4: Sorting Fetch Results
To fetch tasks sorted by title in ascending order, use NSSortDescriptor:
func fetchTasksSortedByTitle() {
    let context = (UIApplication.shared.delegate as! AppDelegate).persistentContainer.viewContext
    let fetchRequest = NSFetchRequest<NSManagedObject>(entityName: "Task")

    let sortDescriptor = NSSortDescriptor(key: "title", ascending: true)
    fetchRequest.sortDescriptors = [sortDescriptor]

    do {
        let tasks = try context.fetch(fetchRequest)
        tasks.forEach { task in
            let title = task.value(forKey: "title") as? String ?? "No Title"
            print("Task Title: \(title)")
        }
    } catch {
        print("Failed to fetch sorted tasks: \(error)")
    }
}
Step 5: Limiting Fetch Results
To fetch only the top 3 tasks, set a fetch limit:
func fetchLimitedTasks(limit: Int) {
    let context = (UIApplication.shared.delegate as! AppDelegate).persistentContainer.viewContext
    let fetchRequest = NSFetchRequest<NSManagedObject>(entityName: "Task")
    fetchRequest.fetchLimit = limit

    do {
        let tasks = try context.fetch(fetchRequest)
        tasks.forEach { task in
            let title = task.value(forKey: "title") as? String ?? "No Title"
            print("Limited Task Title: \(title)")
        }
    } catch {
        print("Failed to fetch limited tasks: \(error)")
    }
}
Example Usage:
fetchLimitedTasks(limit: 3)
Best Practices for Core Data Fetch Requests
- Use Background Contexts: Perform heavy fetch operations on background threads.
- Optimize Fetch Queries: Use predicates and fetch limits to minimize memory usage.
- Handle Errors Gracefully: Always use error handling for fetch operations.
- Test Performance: Regularly monitor fetch request performance for large datasets.
Conclusion
By following this guide, you can efficiently set up Core Data fetch requests in iOS with Swift. Fetching, filtering, and sorting data are essential skills for managing persistent data in your app. Let me know if you'd like additional examples or explanations!

Author Info
Bhumika Patel
Senior iOS Developer & Educator
Bhumika Patel is a senior iOS developer with over 4+ years of experience building successful applications for companies like Apple and Google.
Frequently Asked Questions
Find answers to common questions about the topic.
A fetch request in Core Data is a query that retrieves specific data from the persistent store. It allows developers to filter, sort, and limit results based on defined criteria.
You can create a fetch request using NSFetchRequest, specify the entity name, and execute it using the managed object context. Example:
let fetchRequest = NSFetchRequest<NSManagedObject>(entityName: "Task") let tasks = try context.fetch(fetchRequest)
NSPredicate is used to filter fetch requests based on conditions. For example, to fetch tasks with priority 1:
fetchRequest.predicate = NSPredicate(format: "priority == %d", 1)
Use NSSortDescriptor to define sorting criteria. Example:
fetchRequest.sortDescriptors = [NSSortDescriptor(key: "title", ascending: true)]
Set the fetchLimit property to restrict the number of records returned:
fetchRequest.fetchLimit = 5
Related Articles
Continue your iOS development journey with these related articles.